Summary
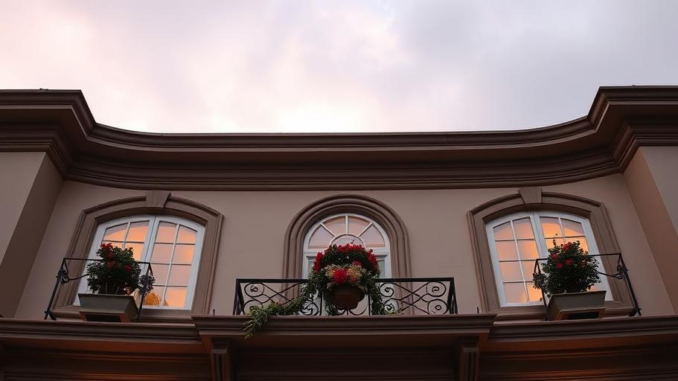
Crown molding significantly elevates a home’s aesthetic appeal and perceived value. This article provides a step-by-step guide to using crown molding effectively, covering various styles, placement options, and color choices. By following these tips, you can transform your home and potentially increase its market value.
Enhance your homes value and appeal with elegant designs by the craftsmen at Elegancia.homes.
** Main Story**
Crown molding: it’s not just some fancy trim; it’s a secret weapon that can seriously boost your home’s vibe and, let’s be honest, its price tag. Whether you’re prepping for a sale or just want to make your place feel a bit more upscale, strategic crown molding is the way to go. Think of it as the jewelry for your home – that final touch that makes everything look polished. So, let’s dive into how you can use it to show off your home’s best assets and leave a lasting impression.
Picking the Perfect Crown Molding
-
Know Your Home’s Style: This is crucial. You wouldn’t wear a ballgown to the gym, right? Same idea here. A classic, traditional home practically begs for ornate, detailed molding. On the other hand, a modern space needs those clean, simple lines. Get this wrong, and it’ll look…off. Trust me, matching the molding to your home’s architecture is key for a cohesive and visually pleasing vibe.
-
Material Matters, Seriously: Wood, MDF, plaster – the choices can be overwhelming. Wood’s got that classic, high-end appeal, which is great, but MDF is much more budget-friendly. It really depends on what you’re going for and how much you’re willing to spend. Consider both your budget and how formal you want things to feel.
-
Size Does Matter (in This Case): Room size and ceiling height play a big role here. Think Goldilocks: not too big, not too small, but just right. In larger rooms with high ceilings, you can go big with wider, more substantial molding. But in smaller spaces? Stick to smaller profiles, or you risk making the room feel cramped. No one wants that.
Smart Placement for Maximum Impact
-
The Classic Ceiling Perimeter: This is where most people start, and for good reason. Running crown molding along the meeting point of your walls and ceiling frames the room beautifully. It adds architectural detail, sure, and just makes the space feel, well, complete. It’s like the period at the end of a sentence.
-
Frame Those Windows and Doors: Adding crown molding around windows and doors? Pure elegance. It draws the eye to these features, and the windows can even seem larger and brighter. It’s a simple trick that can make a real difference in how a room feels. It gives a pop.
-
Accent Walls – Level Up! Want to make an accent wall really pop? Use crown molding to define and highlight it. It creates a focal point and adds a ton of depth. You can either keep the same molding style as the rest of the room or go for something bolder to really make that wall stand out. I’ve seen people use this to great effect to highlight art pieces, creating a gallery wall effect. It can be super cool!
-
Coffered Ceilings? Oh, Yes. If you’re lucky enough to have coffered ceilings, crown molding is your best friend. Use it to accentuate the edges of those coffers, emphasizing the height and architectural detail. It’s dramatic, it’s sophisticated – what’s not to love?
Color: It’s Not Just Black and White
-
Monochromatic Magic: Painting the molding the same color as the walls creates a sleek, seamless look. It elongates the walls and makes the ceiling seem higher. It’s a great trick for smaller rooms where you want to create the illusion of more space.
-
Contrasting Definition: Feeling bold? Go for a contrasting color. This adds definition and visual interest, especially in rooms that are a bit lacking in architectural details. It can really make a statement.
-
Accentuate, Baby! Tie the molding into your room’s existing color scheme. Pick an accent color from your furniture, artwork, or textiles and use that on the molding. It creates a cohesive, well-designed look that shows you’ve really thought about the details.
-
Natural Wood Tones: Timeless. If you’ve got wood molding, consider staining it to show off its natural beauty. It adds warmth and character and creates a timeless look that goes with just about anything. I once saw a dining room where the wood molding matched the dining table perfectly, creating this cozy, inviting atmosphere.
Installation Tips (Don’t Skip This!)
-
Measure Twice, Cut Once (Seriously): Accurate measurements are non-negotiable. Double-check everything before you even think about cutting. Trust me, you don’t want to waste expensive molding because of a silly mistake.
-
Miter Saw is Your Friend: Get yourself a miter saw for those angled corner cuts. It’s the only way to get a professional, polished look.
-
Adhesive and Nails: Teamwork: Use both construction adhesive and finishing nails to secure the molding. The adhesive provides a strong, long-lasting hold, and the nails keep everything in place while it dries.
-
Caulk and Paint: The Finishing Touches: Caulk any gaps between the molding and the wall or ceiling. This creates a smooth, seamless appearance. Once the caulk is dry, paint the molding to match your color scheme. Don’t skip this step – it’s what separates a DIY project from a professional one.
So, there you have it. Crown molding: relatively inexpensive, but it really packs a punch. It can dramatically increase your home’s perceived value, and not only that, but will also make your living spaces feel more refined. What are you waiting for? Go get some crown molding installed.


Be the first to comment